
Welcome to our sewing pattern page. Here you will find our sewing patterns, which you can download and use, along with instructions for them.
If you’ve never used a sewing pattern before, we recommend you check out the video Chloe made, going over how to use them.
-
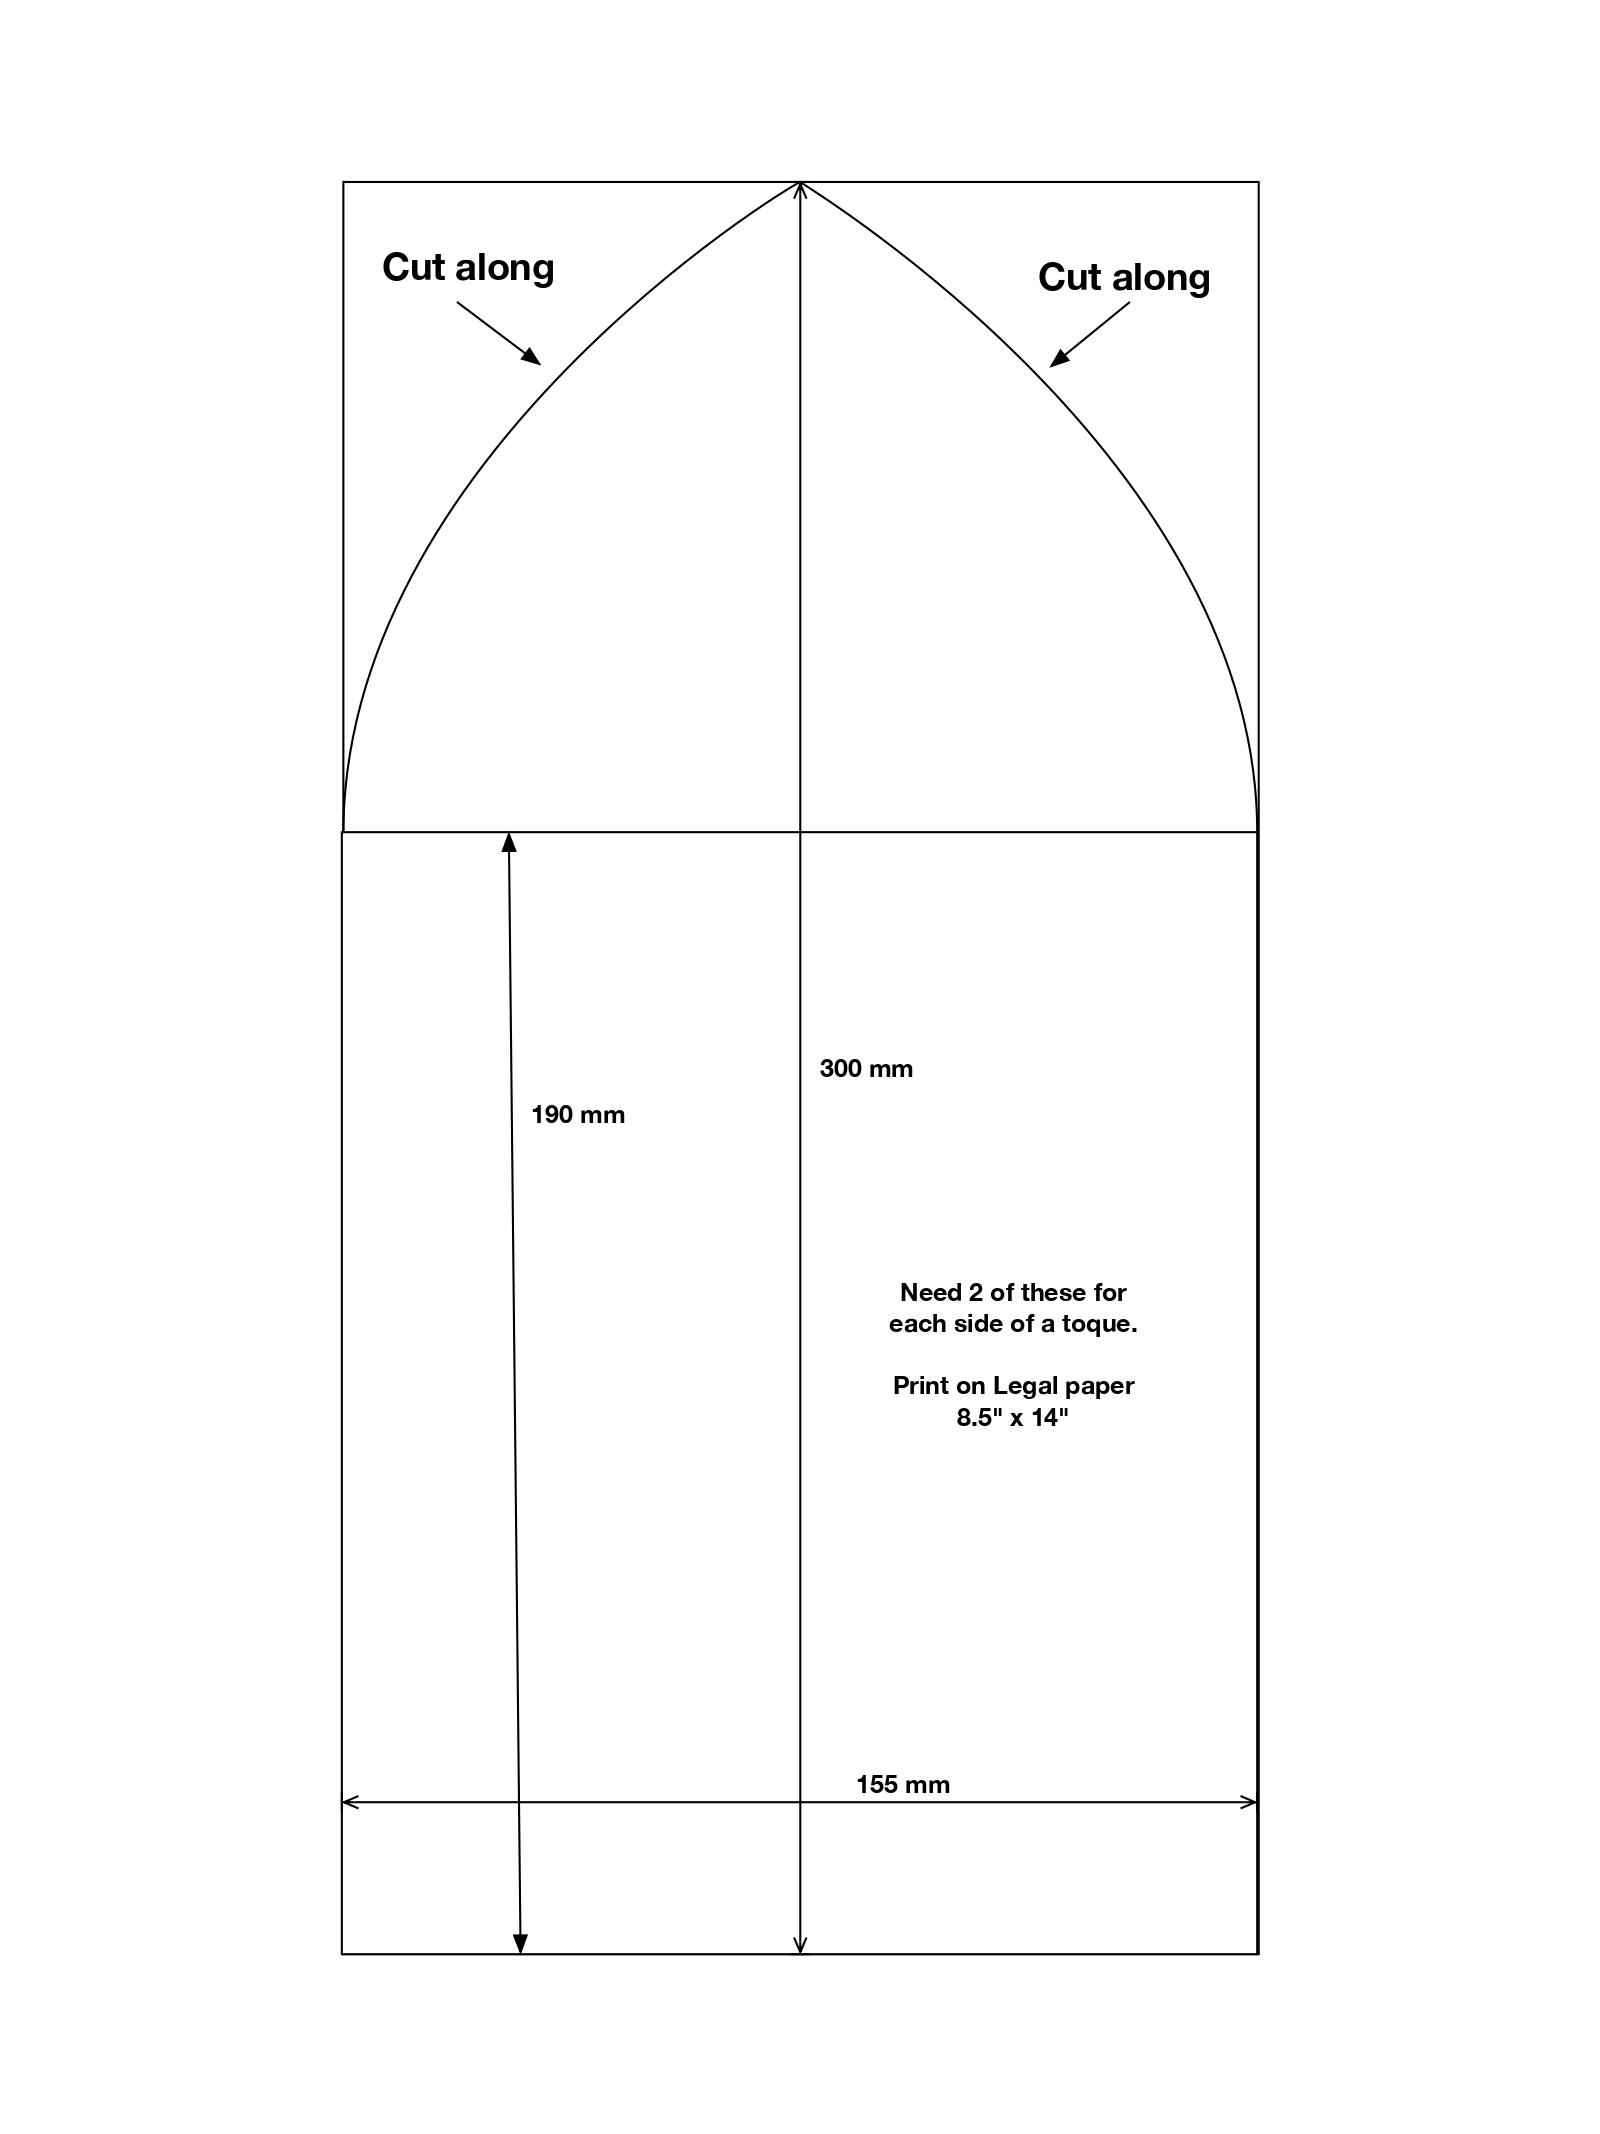
Toque Pattern
If you want to see the tutorial Kaden made using this pattern, you can check it out here.
This is a sewing pattern to create a toque. It is a single page and should be printed on legal sized paper (you will need to print two). Cut out the pattern from each page, and tape them together, flush, side by side.
Take the fabric you are going to use and fold it in half, then place the pattern on the fabric so that the base of the pattern is along the folded edge. Now cut out the pattern. You should end up with one cut out piece.
Now repeat so that you have a second piece (you will need one for the inside, and one for the outside).
Fold each piece long-ways making sure that the right sides are together. Then, along the side that is now folded, sew along the curve, all the way to the point, on both the top and bottom.
flip the pieces right side out, so that you have two pill shaped pieces. Place one on top of the other so that the right sides are facing each other. Now sew the two pieces together around the outside, leaving a enough of a gap at the end that you can flip the toque right way out.
Now, invisible stitch the hole you left, so that it is closed. Tuck the toque inside of itself (so that it makes a toque shape), and roll up the edge.
You now have a toque.
-
Mitten Pattern
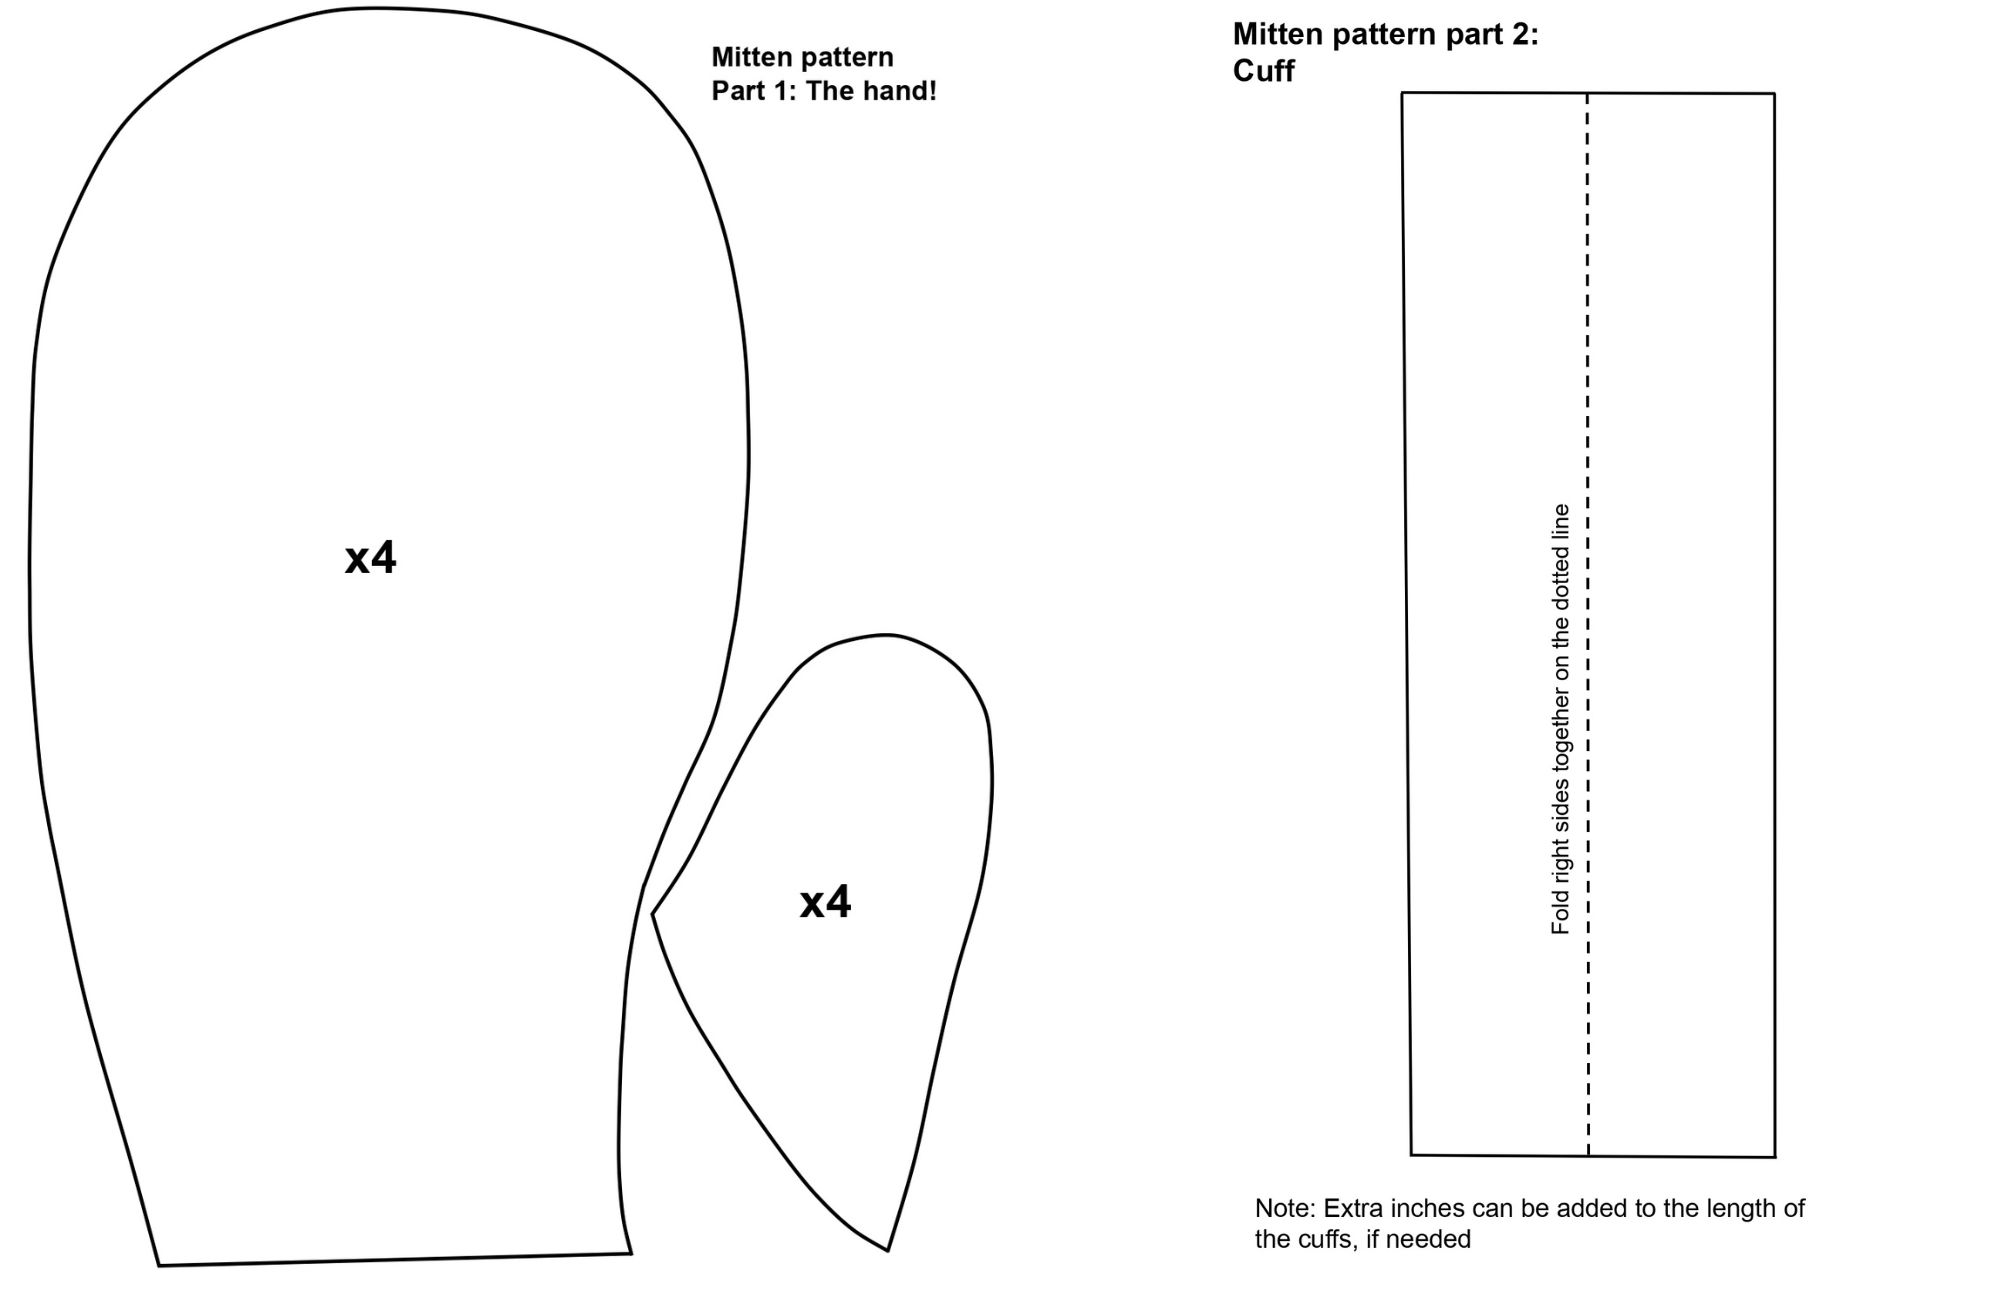
This sewing pattern is comprised of two pages. The first page contains the main hand shape as well as the thumb. The second page contains the cuff. Print off each page on a sheet of letter sized paper, and cut out each of the shapes (do not cut along the dashed line on the cuff). Tape the thumb to the main hand part so that it forms a full hand shape.
Before cutting your fabric, note that this pattern does not include seam allowance. Because of this, you will need to leave a 1cm margin around the pattern when you cut out your pieces. You will need to cut out 2 cuff pieces. Then, for each hand, cut out one hand piece, flip it over, and use it as the stencil to cut out the other piece (don’t add an additional 1cm on the second piece). Flipping over the first piece is important so that the right side of the fabric is facing out on both the front and back of the mitten after you flip it right way out.
With the right sides together, sew the front and back of each hand together. Do not sew across the bottom, where your hand will go in. Now flip the mittens right way out. Next, fold the cuff rectangles in half, right sides together, long way. Sew each cuff along the open long edge so that they form a tube. Then flip them right sides out and sew the short sides together so that the tube is closed and is now a cuff. You should now have two mittens and two cuffs.
Sew the cuffs around the outside of the base of the mittens. You may want to go over them again with a zig-zag stitch for added strength.
Congratulations! You now have a pair of mittens.